- VE
- GF

Food with Feeling
May 5, 2026
Foodwithfeeling.com
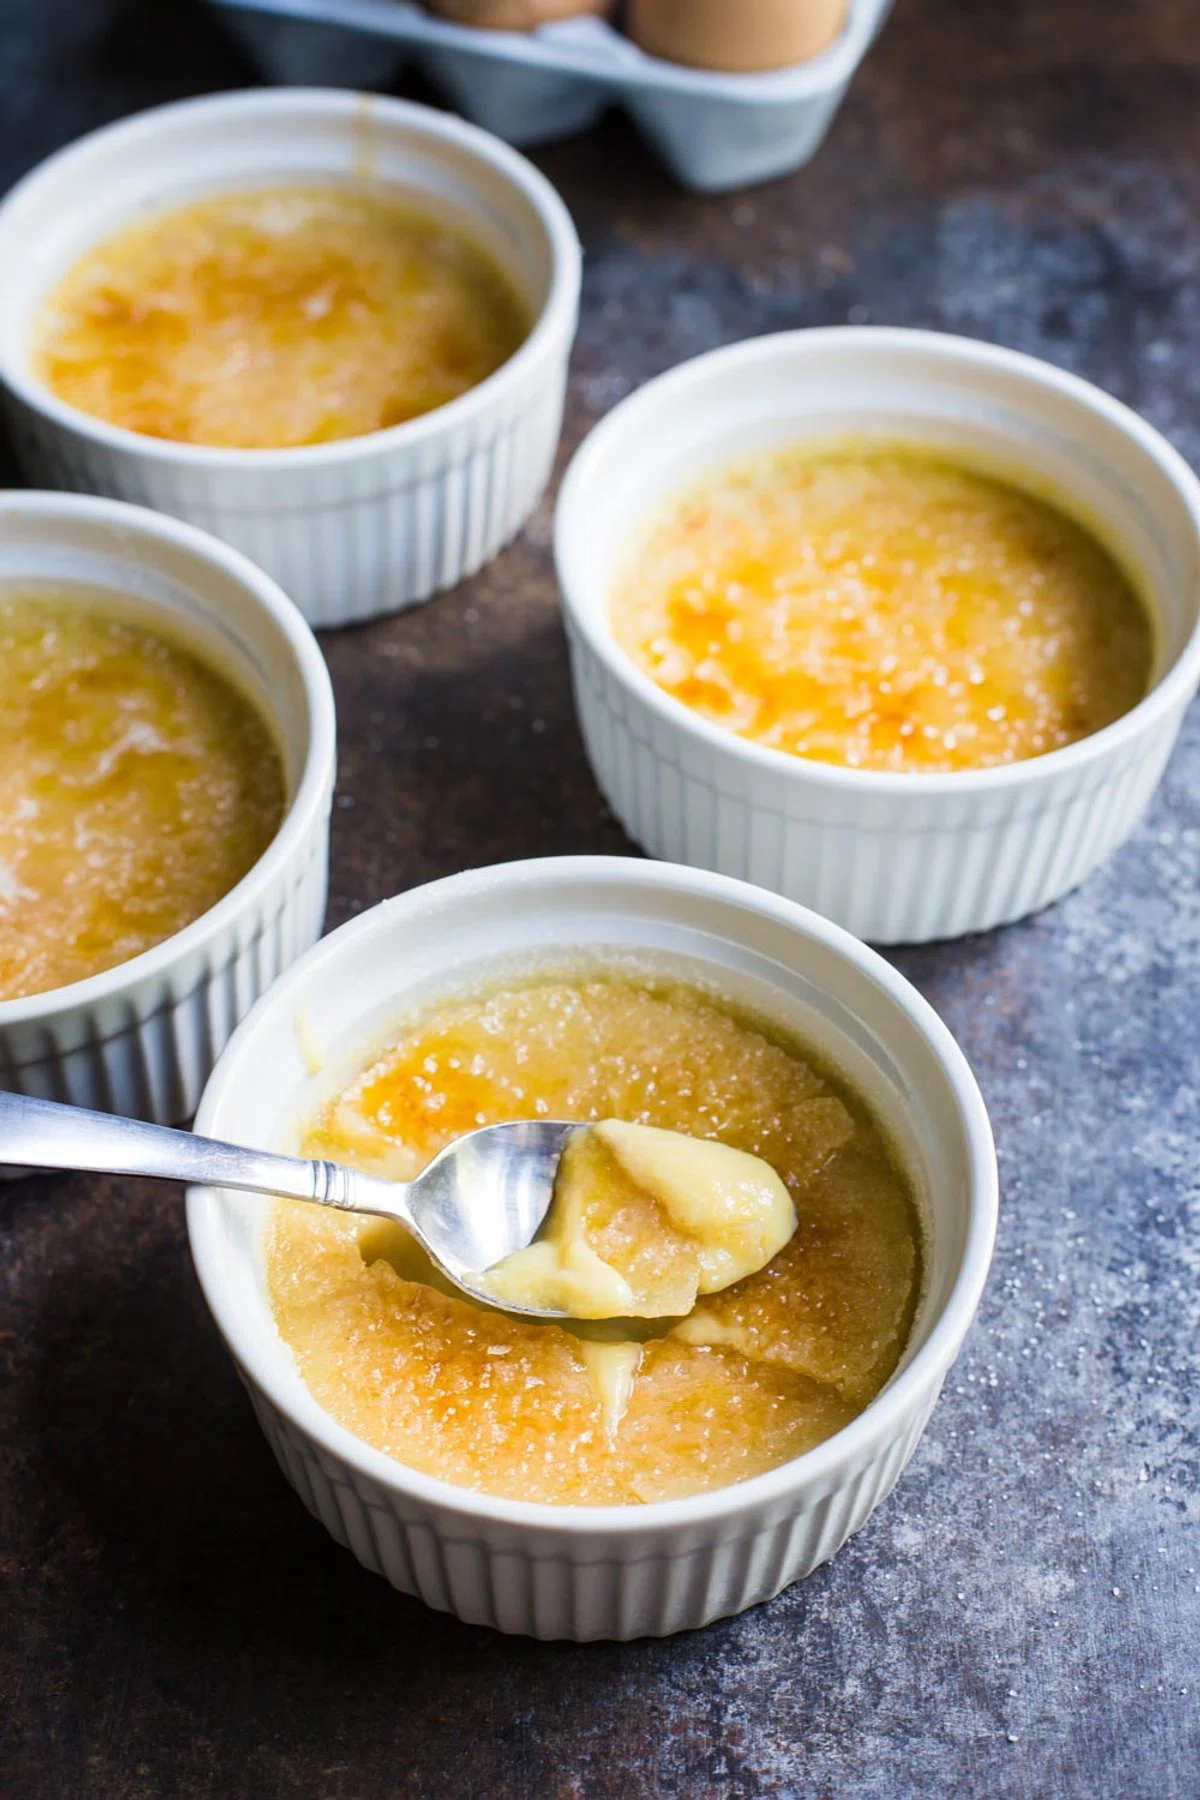
This Dairy Free Creme Brulee recipe is made with coconut cream instead of heavy cream but it’s still delicious and surprisingly easy to make at home!! I’m in love with this creation SO much and am so pleased with how well it turned out.

From the Cook
From the Cook
From the Cook
From the Cook
From the Cook
From the Cook
1/10


Instructions
1
Pre-heat oven to 325 degrees F.
2
In a medium saucepan, combine the coconut cream. It's okay if a tiny bit of the liquid gets into the pan but for the most part, you ONLY want the cream and not any of the liquid at the bottom of the can.
3
Stir in the vanilla extract and heat the pan over medium until it just starts to simmer. Once simmering, take off of heat, cover, and let for 15 minutes.
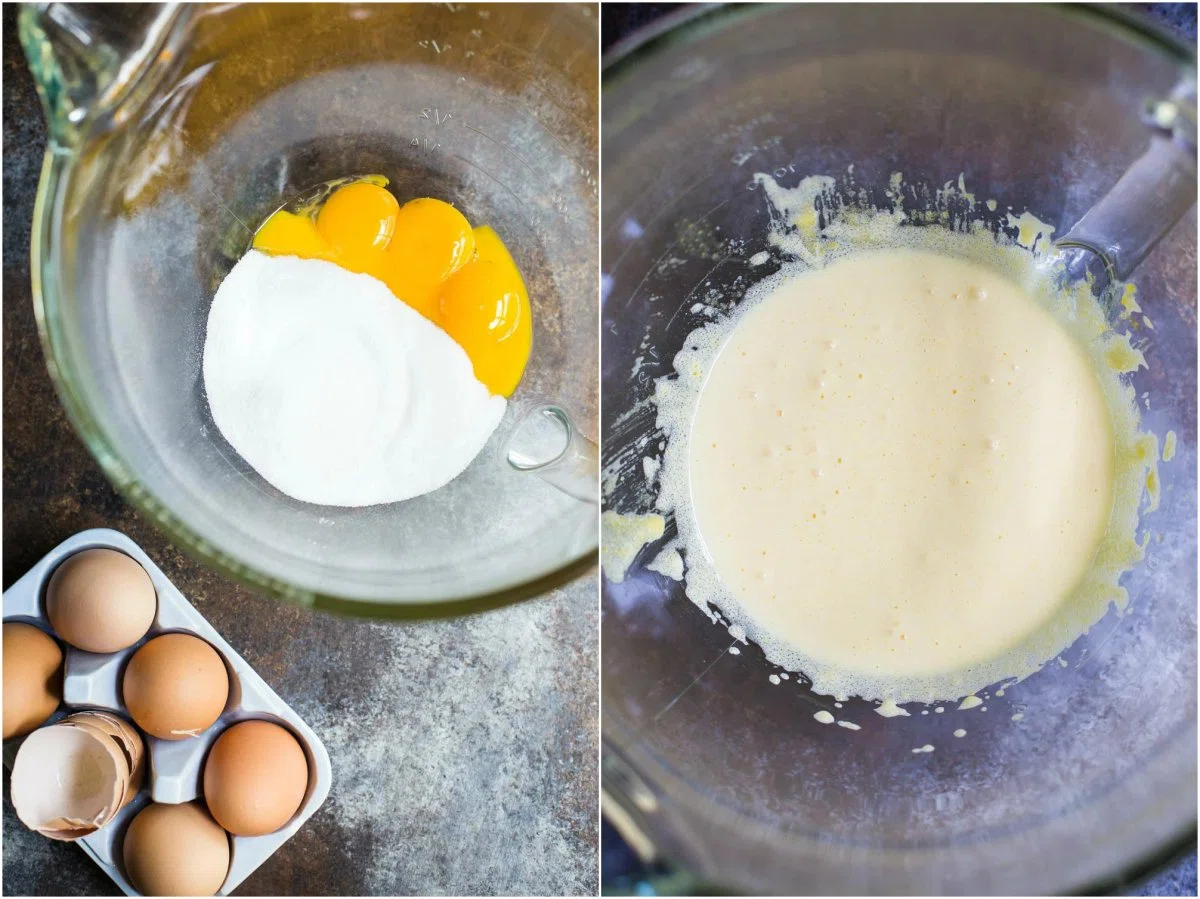
4
When the coconut cream mixture is nearly ready, cream together the egg yolks and the sugar using a stand mixer or hand mixer. Whisk until the yolks start to get lighter in color and the mixture is a bit fluffy.
5
While whisking, pour the coconut cream mixture into the egg mixture and stir to combine.
6
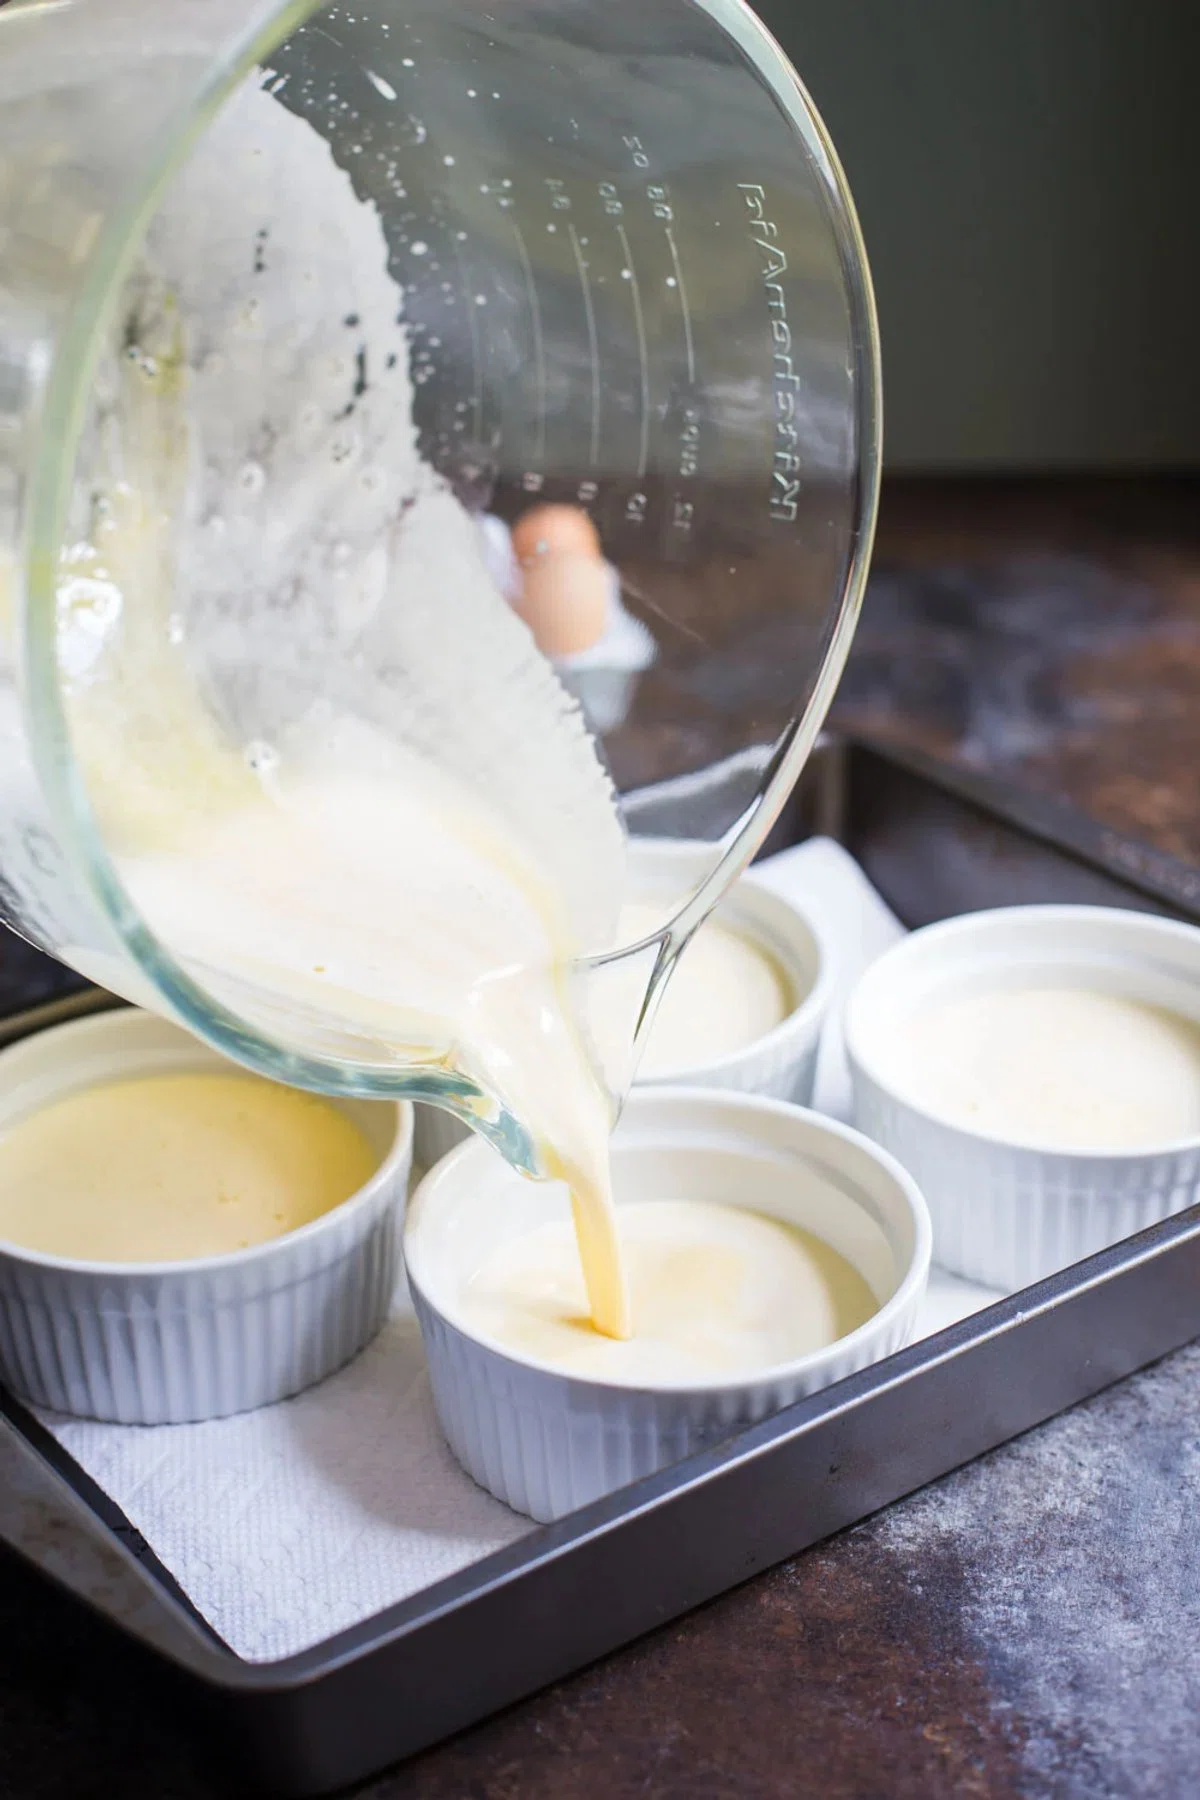
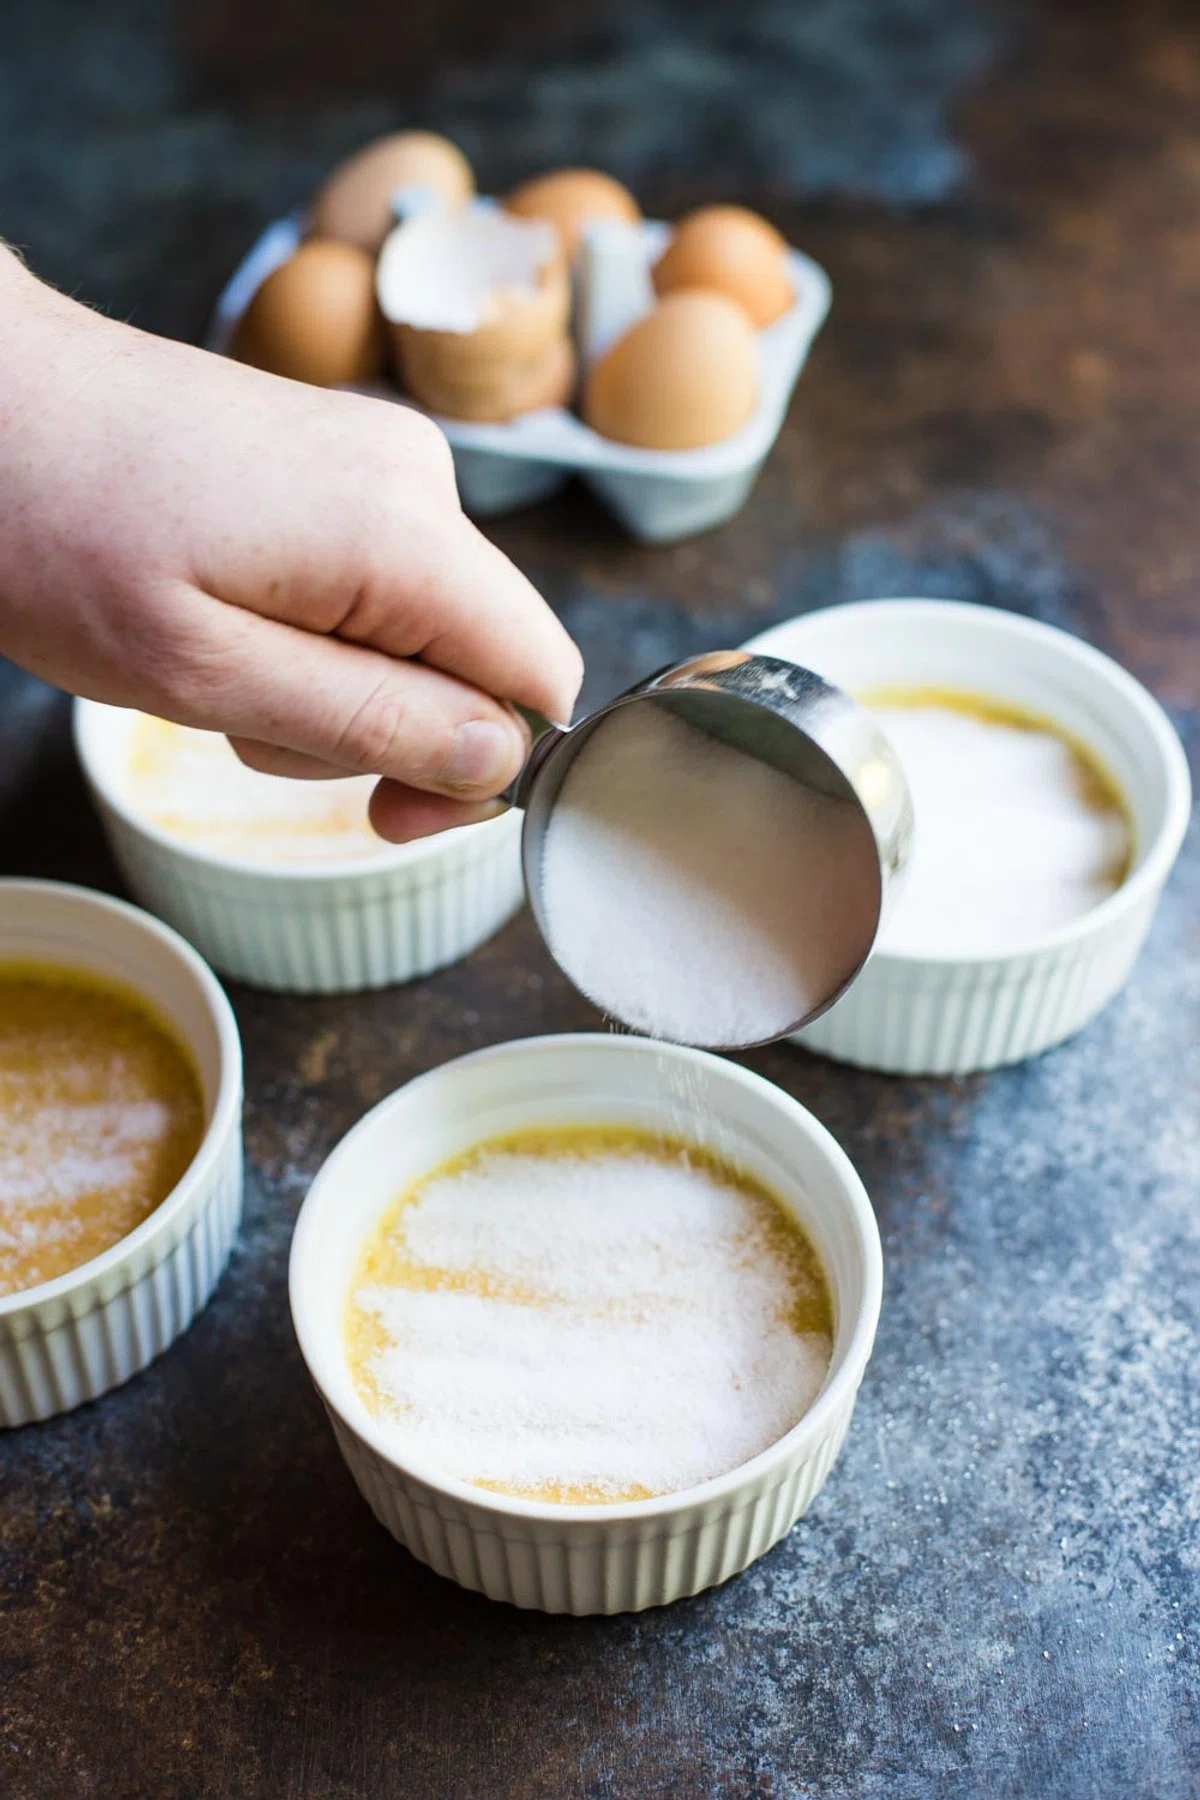
Prepare your baking tray by placing a couple paper towels into the bottom a baking tray with high sides (I used a 13x9 pan and it was perfect). This will prevent your ramekins from slipping while you carry the tray. See picture above if confused.
7
Place four ramekins into the baking tray and pour the crème brulee mixture evenly into the four ramekins.
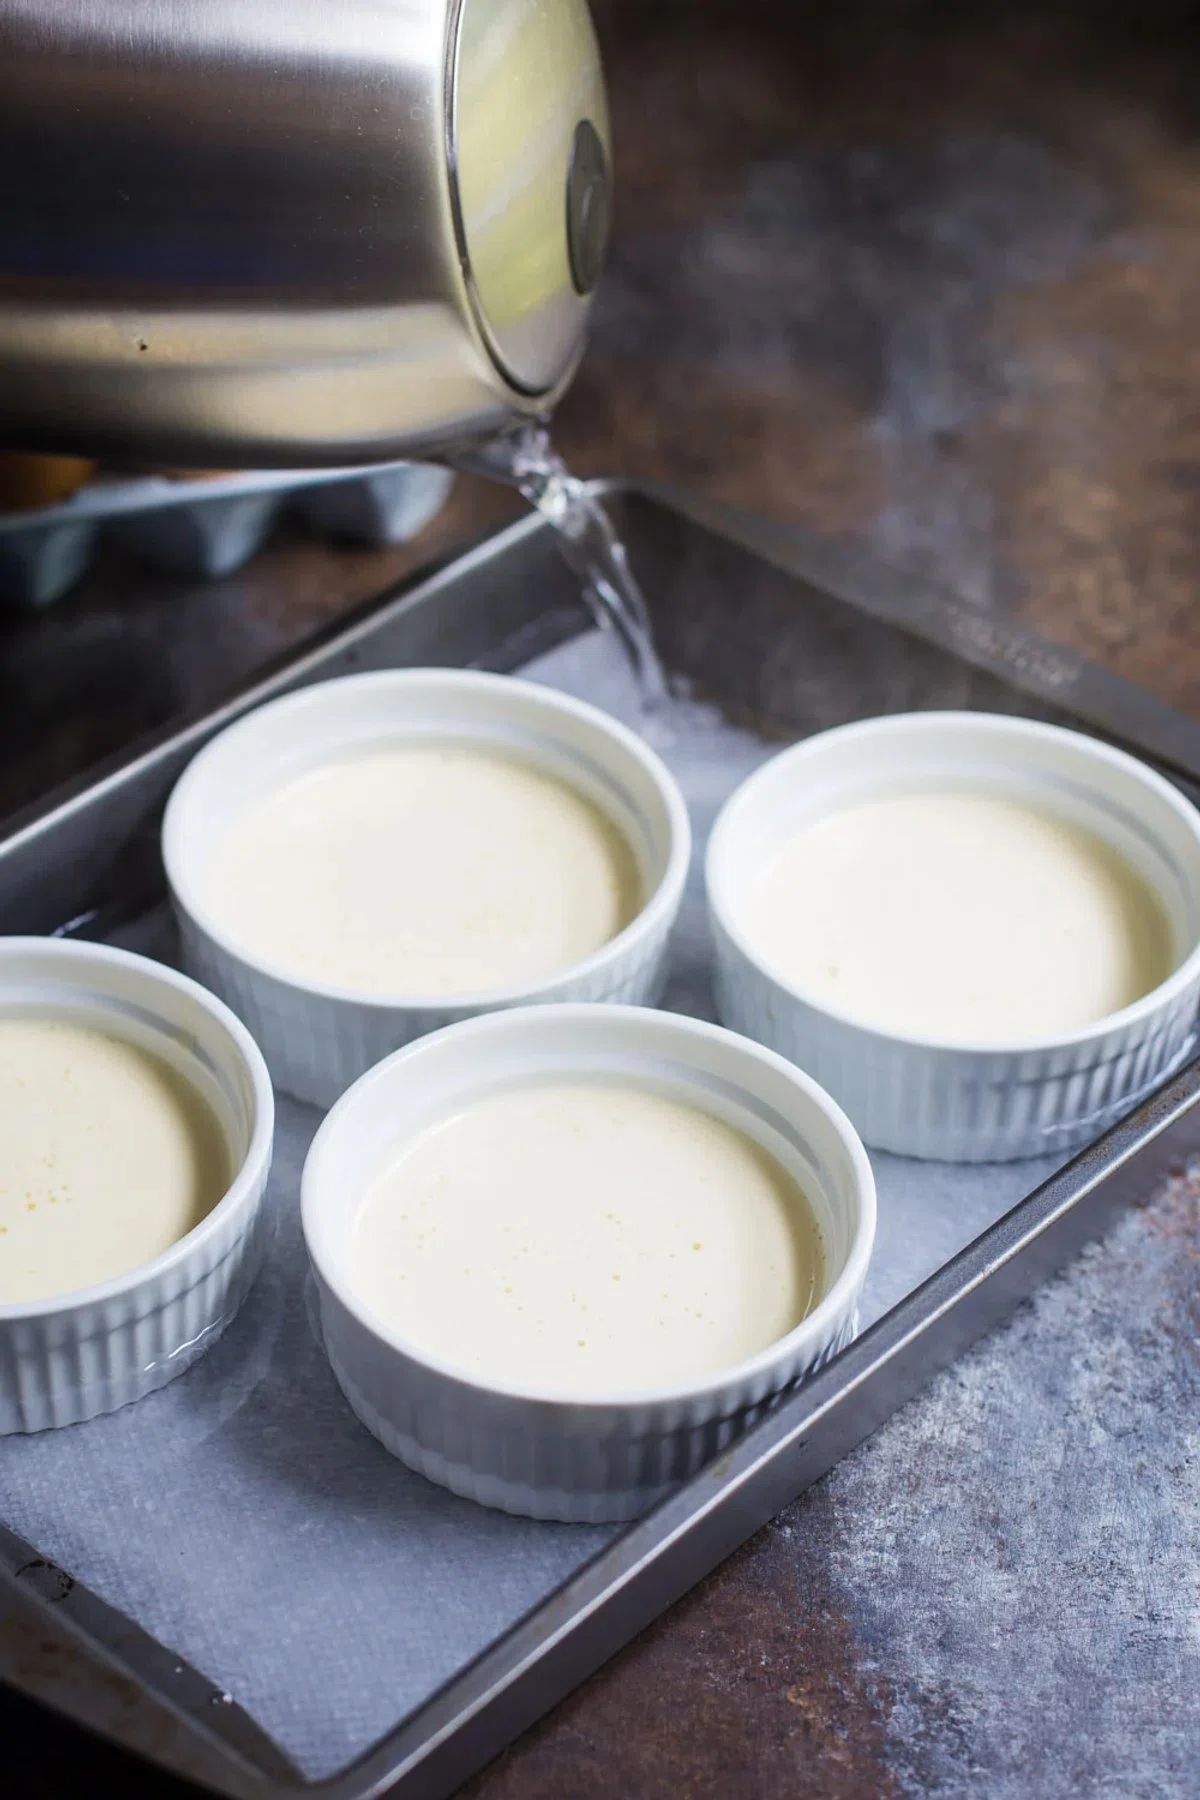
8
Take your hot water and pour it into the tray so it fills it up HALF WAY up the side of the ramekins. Again, see picture above if confused. The water helps the crème brulee to cook more evenly.
9
Bake in the oven for 40-45 minutes. They're done once the top is solid but STILL has a good little bit of a jiggle to it...kind of like pudding.
10
Once out of the oven, let cool enough so that you can touch the ramekins with your hands. Place in the fridge for AT LEAST 3 hours but preferably over night. (they can sit in the fridge for up to 2 days).
11
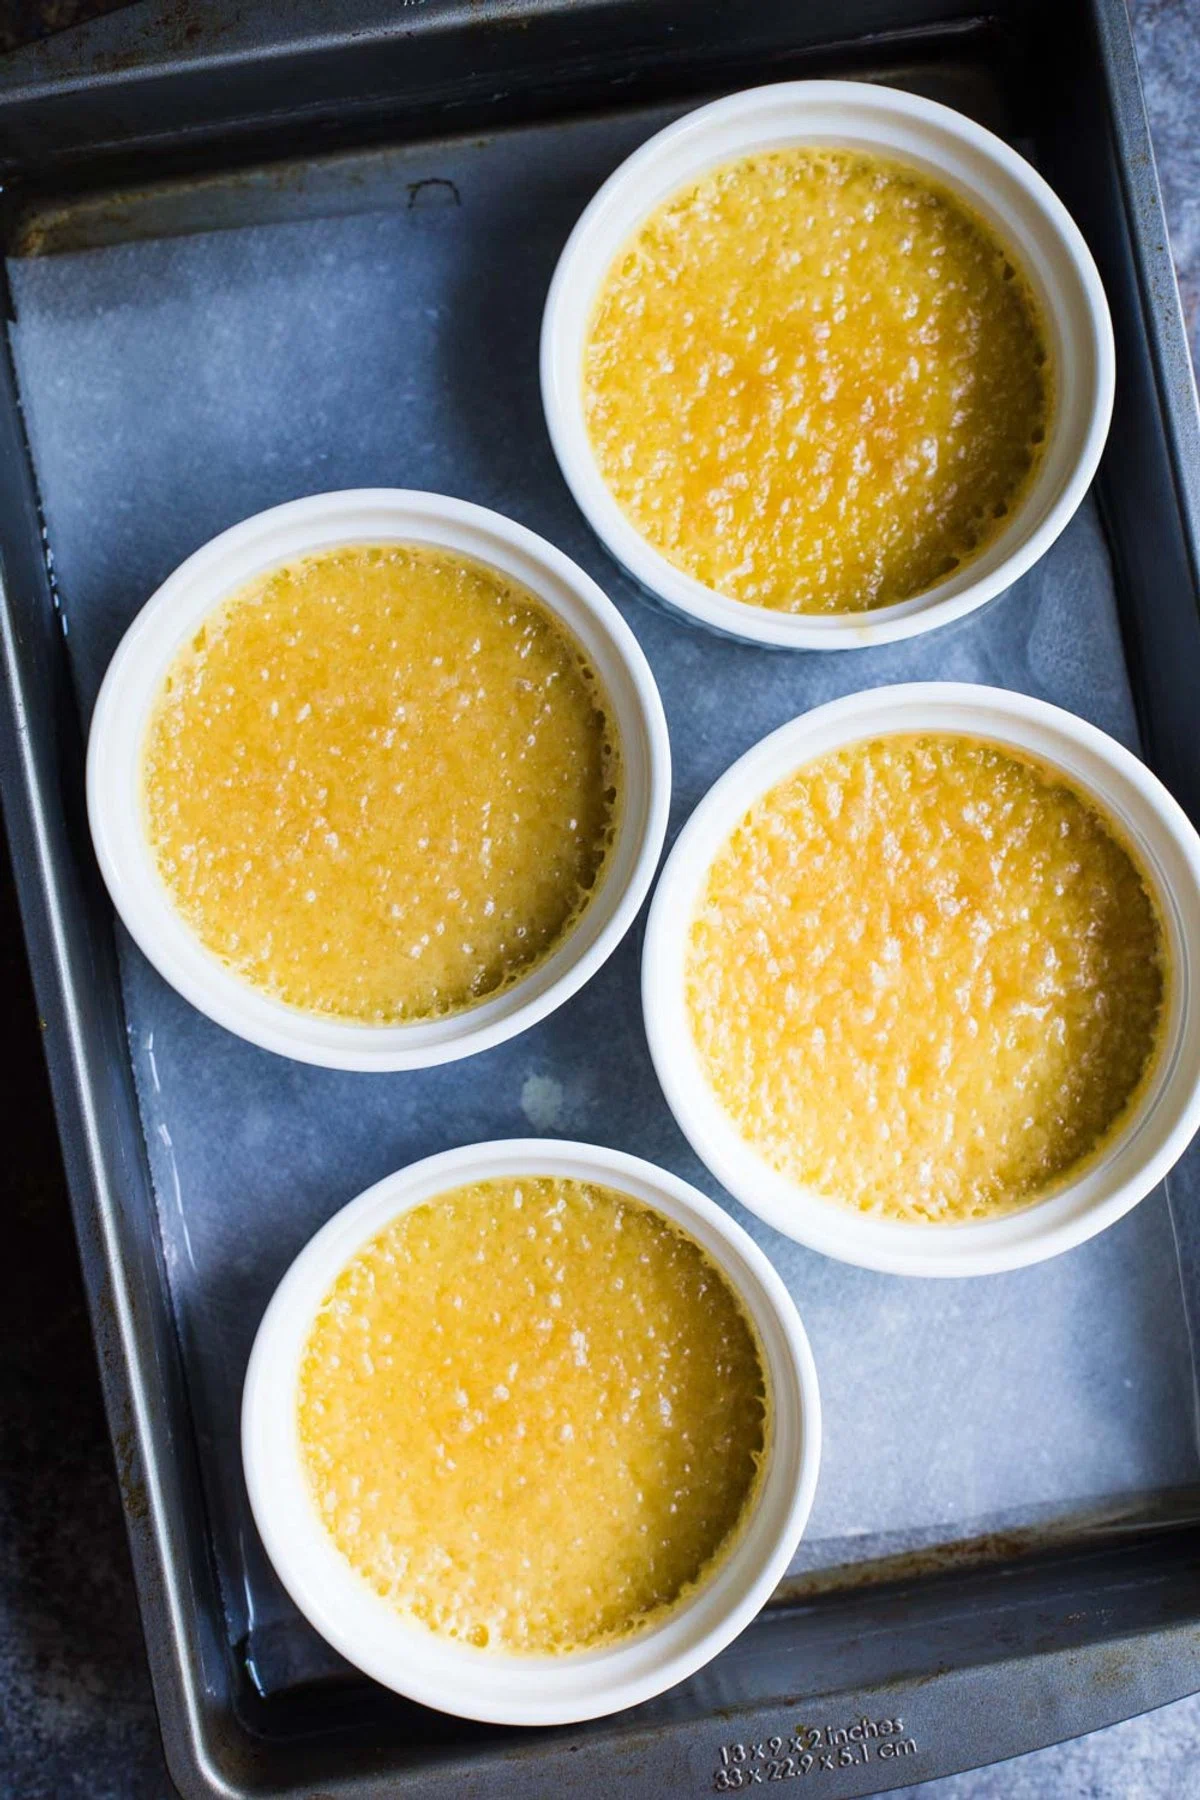
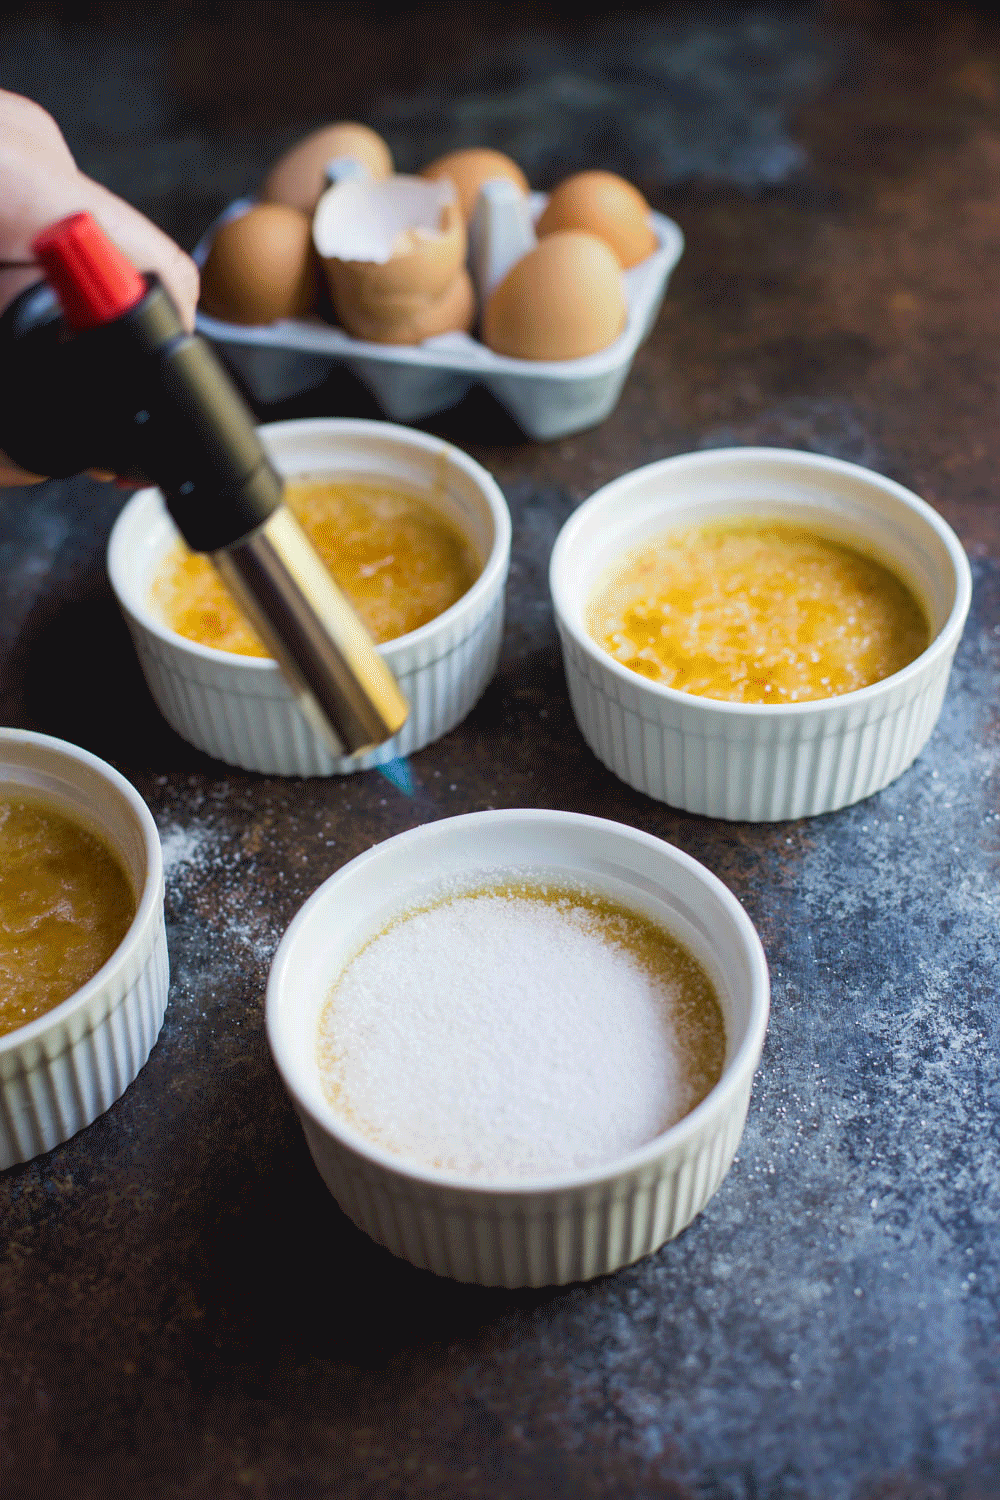
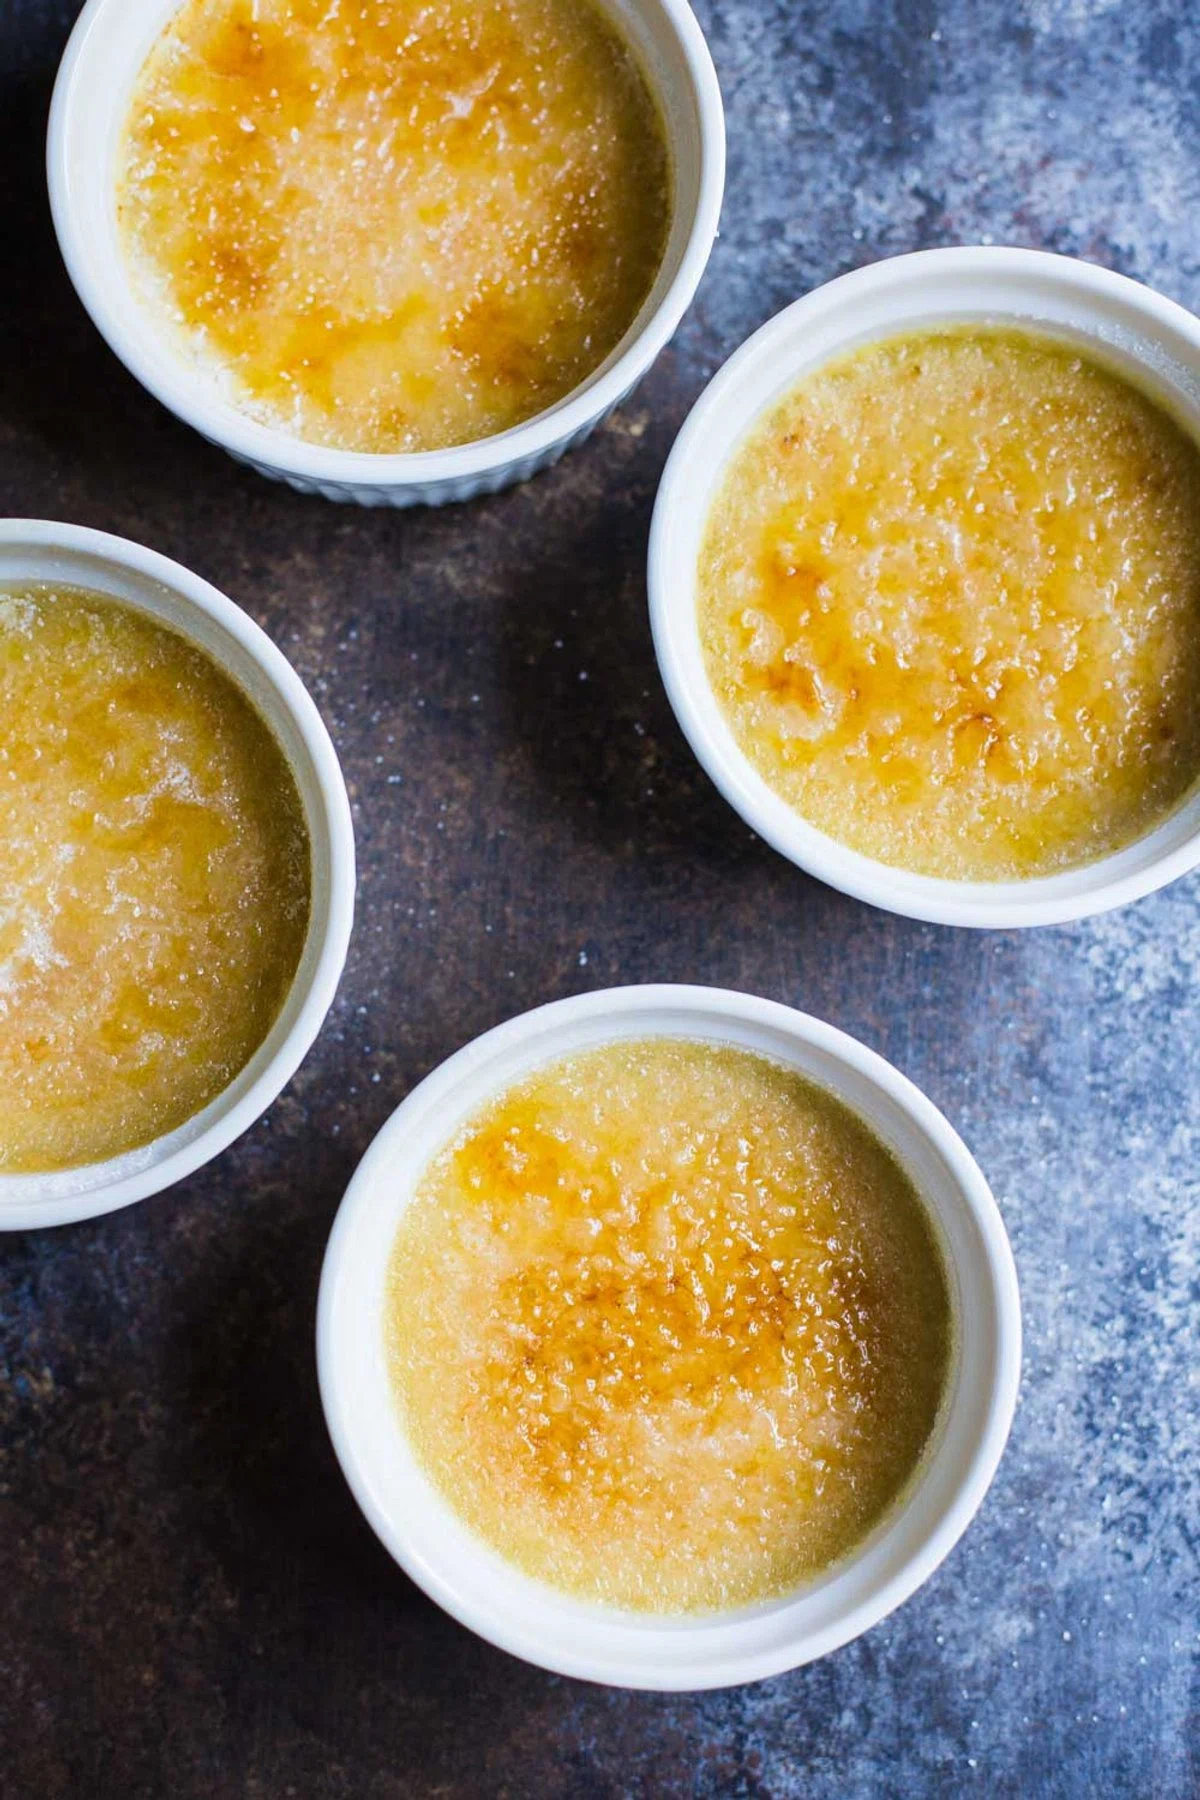
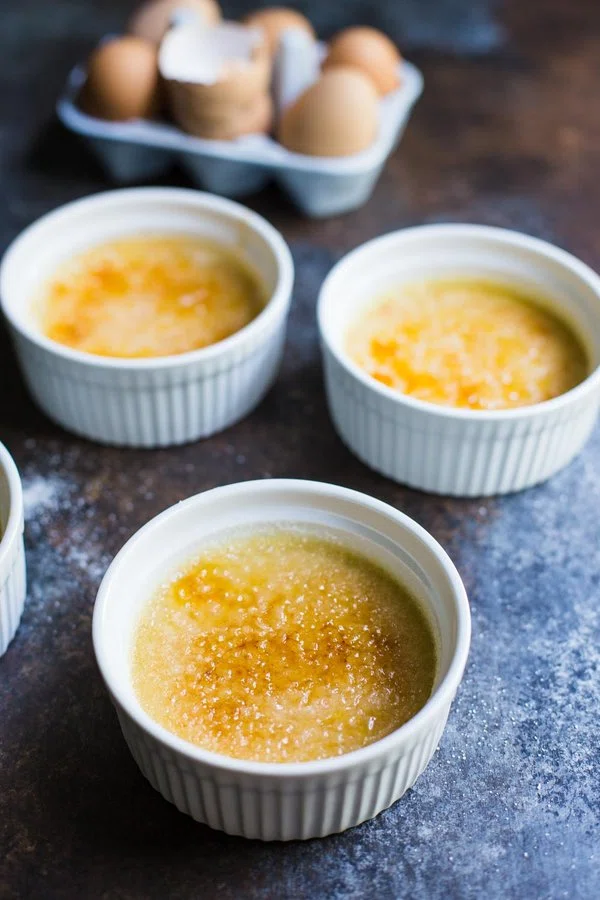
When ready to serve, take out of the fridge and pour about 1-2 tablespoons onto the top of each crème brulee. Using a kitchen torch, torch the tops of each ramekin so that the sugar is fully crystalized and it has a nice deep golden brown color.
12
Serve immediately and ENJOY!!
My Calorie Intake
Review & Earn
Be the first to review this recipe and earn a 20% Bonus
Level up & unlock free Premium by reviewing recipes!
My Notes
Your kitchen notebook is waiting.
Whether it's a recipe tweak or an inspiration burst — jot it down here.
Tips & Tricks (5)
- Stabilize Coconut Cream Texture 🥥Refrigerate your full fat coconut cream overnight and use only the thick cream layer at the top, discarding the liquid, to achieve a custard consistency that sets properly like traditional crème brûlée.
- Perfect Water Bath Temperature 💧Keep your hot water bath at 325°F (160°C) and ensure it reaches halfway up the ramekins to create even, gentle heat that prevents the custard from curdling or developing a rubbery texture.
- Strain for Silky Smoothness 🫖Pour the custard mixture through a fine-mesh strainer before baking to remove any cooked egg particles or vanilla bean specks, resulting in an impossibly smooth, luxurious texture.
- Chill Before Caramelizing ❄️Refrigerate the baked custards for at least 4 hours (or overnight) before torching; cold custard prevents the filling from melting when you caramelize the sugar topping.
- Torch Technique for Crackle 🔦Sprinkle an even, thin layer of sugar on top and hold the torch 2-3 inches away, moving in circular motions until the sugar melts into a golden amber color, then let it cool for 30 seconds to harden into that signature crackly shell.


Recipe Facts
Diet at a Glance
 Vegetarian
 Gluten Free
My Calorie Intake
Smart Nutrition 
Nutrition Per Serving
Percent Daily Values are based on a 2,000 calorie diet. Your daily values may be higher or lower depending on your calorie needs.
Glycemic Analysis
Glycemic Index
Glycemic Load
More Recipes From Food with Feeling
From the creator of this recipe

No Recipes Available
Recommended Recipes for you
Tailored to your preferences