- VE
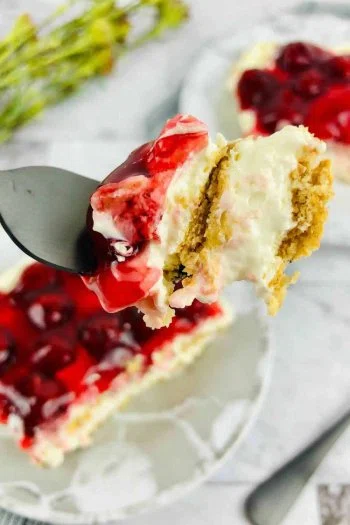
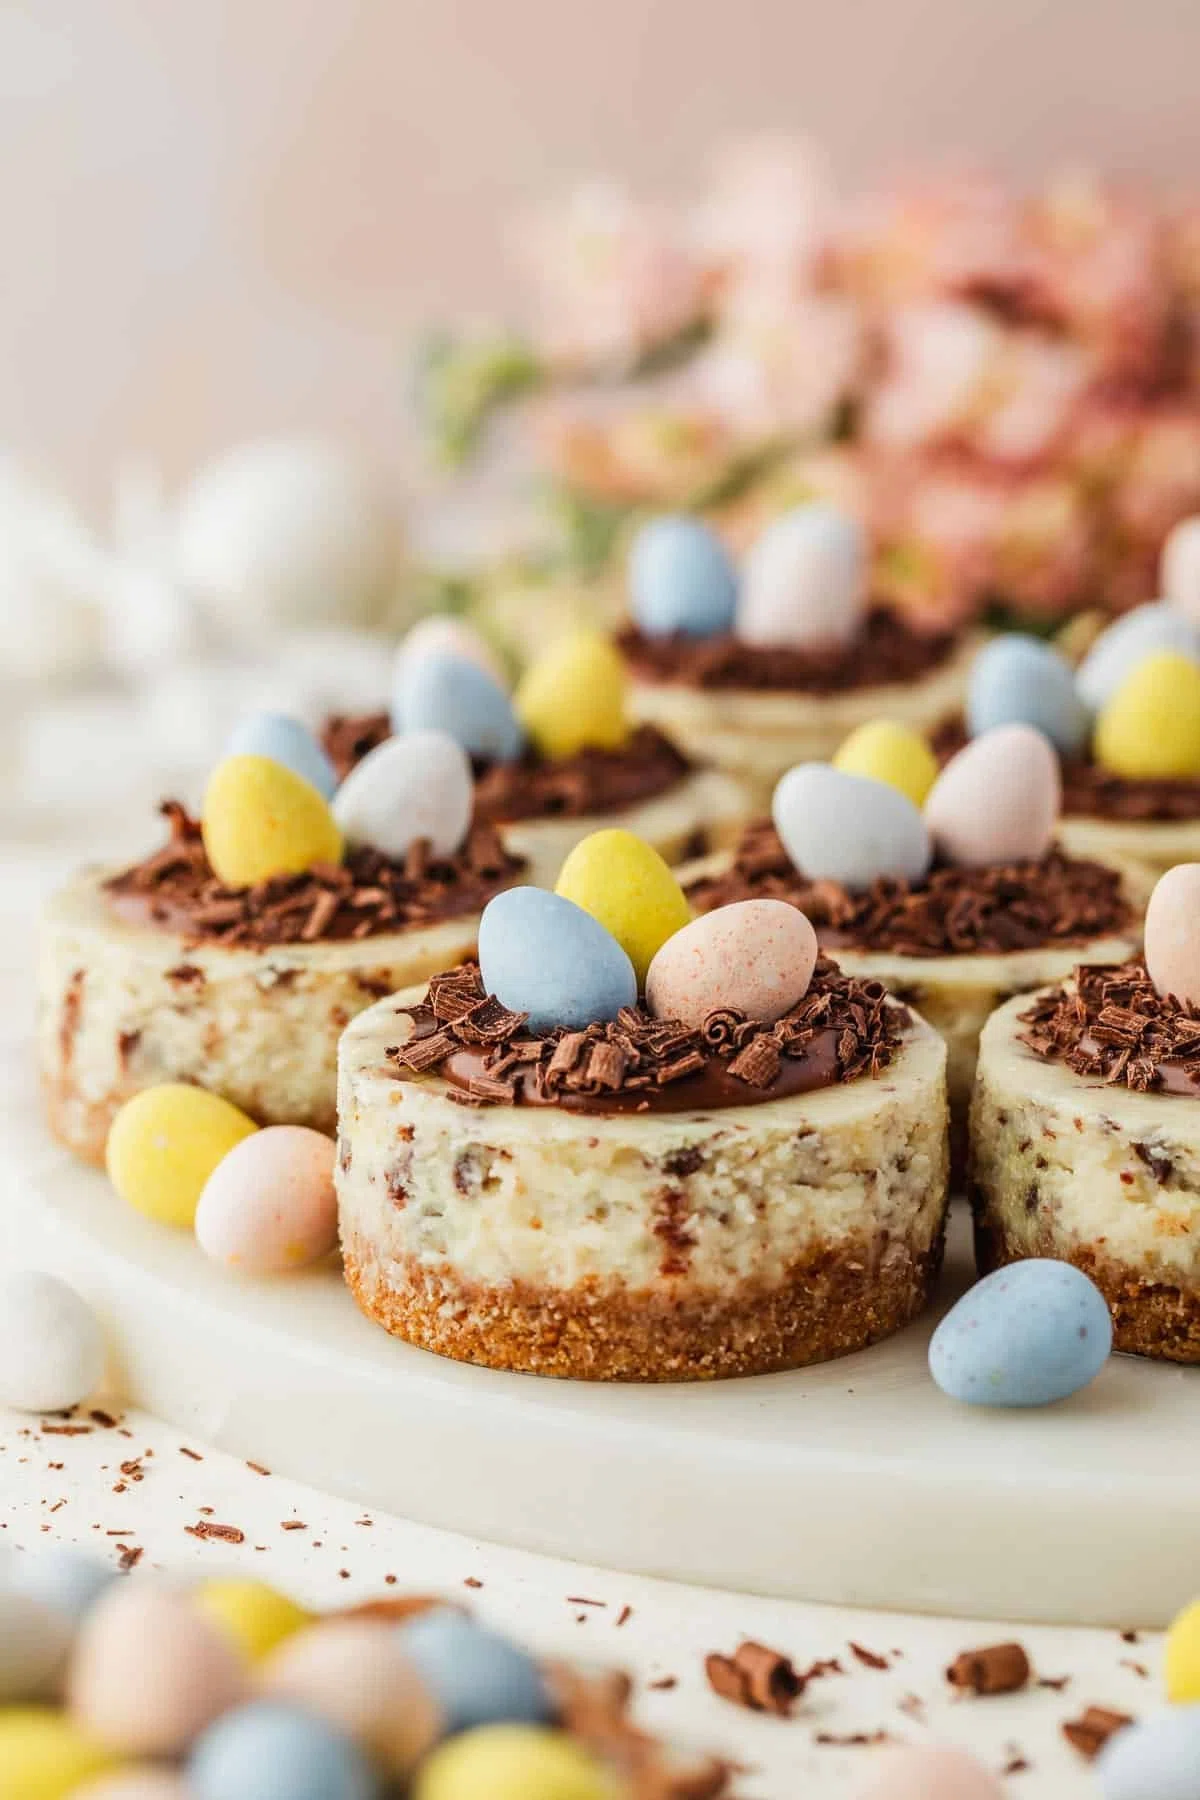
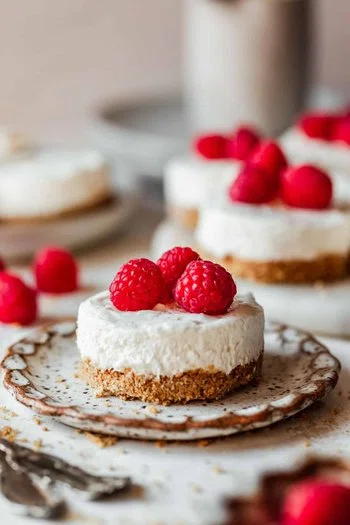
Mini Easter Egg Cheesecakes with Chocolate Ganache

These mini Easter egg cheesecakes are beyond delicious but also super easy! They have buttery graham cracker crusts, ridiculously creamy filling, and puddles of milk chocolate. The cheesecakes are then topped with chocolate ganache "nests" and egg candies for a cute and simple decoration. They're so pretty and make 12 individual servings for a crowd!
Ingredients
Graham Cracker Crust
Cheesecake Filling
Ganache and Decoration
Instructions
Graham Cracker Crust
- Step 1
Preheat the oven to 325°F (163°C). If you're using a standard cupcake pan, line the cups with paper liners for easy removal.
- Step 2
Add the graham crackers to the bowl of a food processor and pulse until you have semi-fine crumbs. You should have about 1 1/2 cups of crumbs (150 grams). Add the sugar and melted butter, and pulse the mixture until the graham crackers are finely ground and you have a thick dough.
- Step 3
Evenly divide the graham cracker mixture into the mini cheesecake cups, about 2 tablespoons per cup (or 1 1/2 tablespoons per cupcake liner). Use a pastry tamper or the handle of a wooden spoon to press the mixture evenly into the bottom of the cups. Bake for 5 minutes, until the crusts are toasty and light golden-brown. Let the crusts cool completely while you prepare the filling.
Cheesecake Filling
- Step 4
Fill an oven-safe pan (like a small cake pan) with a few inches of water. Set aside.
- Step 5
Add the butter and sugar to a large mixing bowl. Using a hand mixer or stand mixer, beat the butter and sugar together for 1-2 minutes. Then, add the cream cheese and beat until it's light and fluffy, scraping down the sides of the bowl every once in a while. Mix in the sour cream and vanilla bean paste or extract. Add the eggs and stir until smooth. Then, fold the chopped egg candies into the filling, just until the candies are well-distributed.
- Step 6
Using a #20 cookie scoop, evenly divide the filling between the cooled crusts, about 3 Tablespoons per cup (or 2 tablespoons per cupcake liner). Use a butter knife to smooth the filling evenly over the crusts, making sure it gets into all the edges.
- Step 7
Place the mini cheesecake pan on the middle rack of the oven and set the pan of water on the rack under the mini cheesecakes. Bake at 325°F (163°C) for 15-16 minutes, or until the edges are set and the centers are still a bit wobbly (but not liquid-y). If they're not done after 16 minutes, bake them for another 1-2 minutes.
- Step 8
Once the cheesecakes are baked, turn off the oven and crack the oven door. Let the mini cheesecakes cool for 1 hour in the oven to keep the tops from cracking. Then, cover the pan and refrigerate the cheesecakes for another 3-4 hours or until the filling is completely set. Carefully remove the cheesecakes from the pan.
Ganache and Decoration
- Step 9
Microwave 58 grams (2 ounces) of the milk chocolate in 5-second increments, just until it's slightly softened. Don't let the chocolate melt! Then, use a vegetable peeler to gently peel curls off the bar.
- Step 10
Chop the remaining 58 grams (2 ounces) of chocolate into small chunks and place them in a small heat-proof bowl. Pour the heavy whipping cream into a small saucepan. Bring the mixture to a gentle simmer, stirring often, but don't let the cream boil!
- Step 11
Once the heavy cream is hot, pour it over the chocolate and let it sit for about 5 minutes. Then, stir the ganache until it's very smooth. Let it cool, stirring occasionally, until it's thickened to the consistency of fudge sauce.
- Step 12
Once the ganache is thickened, spoon about 1 teaspoon on top of each mini cheesecake. Use a teaspoon or butter knife to spread the ganache into a circular "nest" shape. Sprinkle the chocolate curls on the edges of the ganache nests.
- Step 13
Right before serving, place 3 mini egg candies in the middle of each ganache nest. Serve immediately and enjoy!
Tips & Tricks

@Sunday-table
I’m Sara, the creator behind Sunday Table, sharing cozy, modern small bites and mini desserts made for entertaining. Trained in baking and culinary arts, I’ve been creating elevated, crowd-pleasing recipes since 2012 (with lots of coffee). ☕️
Per serving
Be the first to review this recipe and earn a 20% Bonus
Level up & unlock free Premium by reviewing recipes!
More Recipes From Sunday Table
From the creator of this recipe


No Recipes Available
Recommended Recipes for you
Tailored to your preferences