Ninja Foodi Stroopwafel Cheesecake
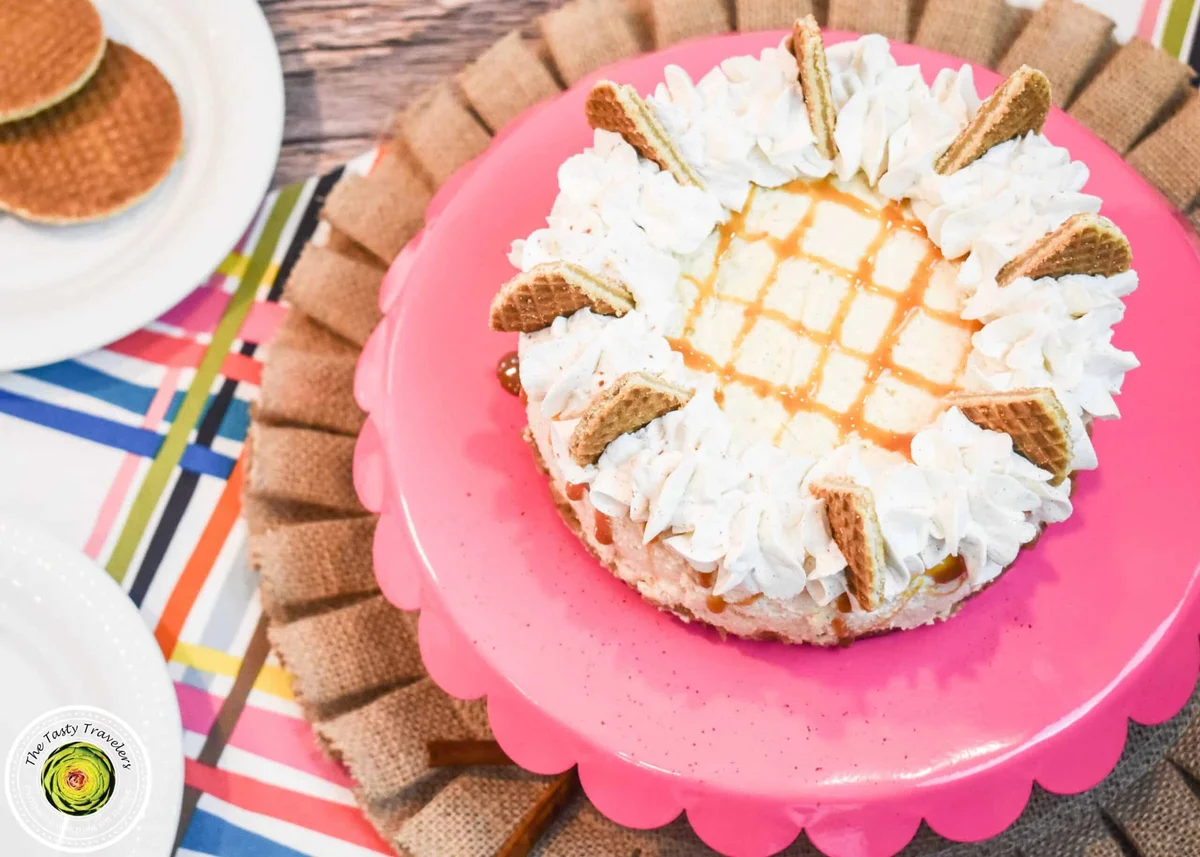
The Tasty Travelers Cinnamon and caramel deliciousness!! A couple of weeks later while at Costco, I came across a very large package of Stroopwafels and just had to buy them. I decided to turn some of these cookies into a cheesecake using my Ninja Foodi ! This turned out to be a great decision! The combination of the caramel and creamy cheesecake turned out great but my favorite part has to be the chewy crust! 1.Leave cream cheese, butter and eggs on the counter so that they are room temperature when you begin to make your cheesecake. If you use cold ingredients, your cheesecake will be lumpy.
Ingredients
Crust
Cheesecake Filling
Cinnamon Frosting
Instructions
Make the crust
- Step 1
Combine all crust ingredients in a blender and blend until mixture becomes the consistency of damp sand.
- Step 2
Pour crust ingredients into a 7 inch springform pan. Be sure to pat down the crust using a spatula or spoonula. The crust should cover the entire bottom of the pan and about an inch of the side of the pan. For easier release after cooking, you can line your springform pan with parchment paper (not waxed paper) before pouring in the crust ingredients. This is not necessary but can be done if desired.
Make the cheesecake filling
- Step 3
Clean out your blender. You’re going to use it again.
- Step 4
Combine all cheesecake filling ingredients, except the eggs, in a blender and blend just until fully combined. Add the eggs once all ingredients have been combined. blend for an additonal 5 seconds. Do not over mix. The more you mix the cheesecake filling once the eggs have been added, the more air that will get added. The more air, the fluffier the cheesecake will be. I was looking for a denser cheesecake so I made sure to only blend until combined.
- Step 5
Pour all of the cheesecake mixture into the springform pan on top of the crust. Pan should be about 3/4 of the way full.
- Step 6
Tap the filled pan several times on the counter to eliminate all of the extra air. Cover the entire pan with aluminum foil. Be sure to cover the bottom and sides too.
Pressure cook the cheesecake
- Step 7
Place trivet or small metal rack into the pressure cooker along with 2 cups of water.
- Step 8
Place springform pan into your sling. I use the OXO Good Grips Sling and it works perfectly. If you don’t have a sling, you can make one by folding strips of foil and cradling your pan in and out of the Ninja Foodi.
- Step 9
Gently place sling into Ninja Foodi onto trivet. Close Ninja Foodi lid and cook on high pressure for 40 minutes. Once timer beeps, let pressure natural release for 25 minutes. Release remaining steam and open lid.
- Step 10
Gently remove sling and cheesecake from the pressure cooker. Remove the foil. The center of the cheesecake will have a jiggly spot about the size of a half-dollar. If more of the center is jiggly, pressure cook for an additional 5 minutes. If the cheesecake has blossomed, gently tap on the countertop several times to remove additional air.
- Step 11
Using a knife, gently separate the cheesecake from the sides of the pan. You just want to make sure that it doesn’t stick once it’s cooled.
- Step 12
Cool on counter for about an hour and then place in the refrigerator. Cool cheesecake for at least 2 hours.
Make the cinnamon frosting
- Step 13
Combine cream cheese and powdered sugar in an electric mixer. Beat until well combined and smooth.
- Step 14
Slowly add in heavy whipping cream, vanilla, salt, and cinnamon. Beat on high until stiff peaks form when you stop the mixer and lift the whisk out of the bowl. Use a piping bag if desired and frost chilled cheesecake. Serve and enjoy!
Tips & Tricks
Per serving
My Notes
PrivatePRIVATE TO YOUOnly you can see these
Private to you. Jot down what you changed so it's here next time you cook this.
Keep your own notes on this recipe
Private to your account — what you changed, what you'd do differently next time.
Be the first to photograph this dish and earn a 30% bonus
Level up by reviewing recipes!
