- LC
Witch Finger Cookies

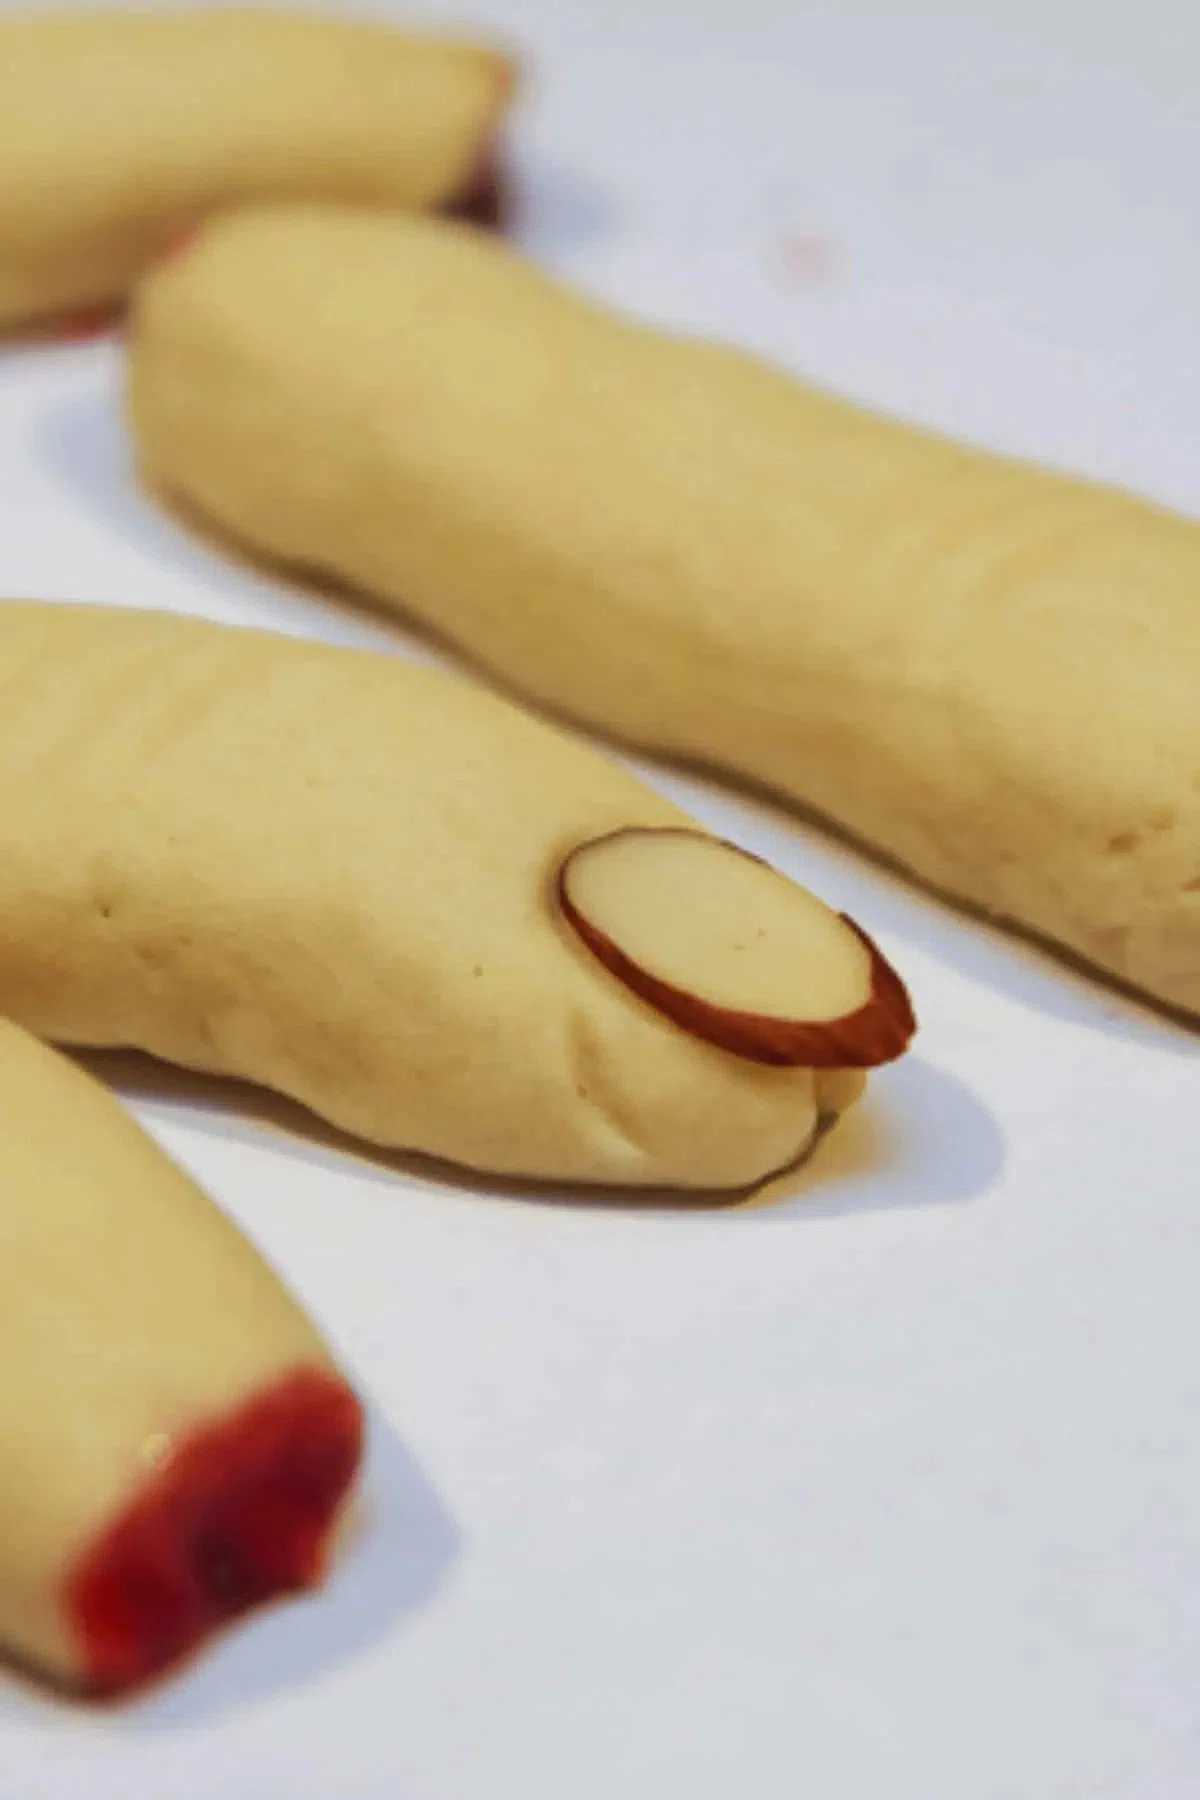
Spooky Witch Finger Cookies are a ghoulishly appealing treat for your next Halloween party. They’re so much fun to make and look just like a severed index finger. These witch finger cookies are a fun and festive treat that’s perfect for Halloween parties or as a spooky snack for your kids. With a few simple ingredients and a little creativity, you can create a delicious and creepy treat that everyone will love.
Ingredients
Instructions
- Step 1
In a large bowl combine eggs, shortening, margarine, vanilla and sugar.
- Step 2
Beat ingredients together until well mixed.
- Step 3
In a separate bowl, combine flour, baking powder and salt.
- Step 4
Slowly incorporate dry ingredients into wet ingredients until fully combined.
- Step 5
Form dough into a ball and cut into four equal parts.
- Step 6
Refrigerate for 20-30 minutes.
- Step 7
Preheat oven to 375 degrees F.
- Step 8
Lightly grease baking sheets.
- Step 9
Remove one ball of dough from refrigerator.
- Step 10
Scoop 1 heaping teaspoon of dough and roll into a thin finger-shaped cookie.
- Step 11
Gently press one whole slivered almond (do not use broken almonds) into one end of each cookie so it extends slightly beyond the end of the cookie.
- Step 12
This should give the appearance of a long fingernail.
- Step 13
Cut into the dough slightly with a sharp knife near the top and at the center of each finger to make the ridges of knuckles.
- Step 14
Arrange the shaped cookies on the baking sheets.
- Step 15
Bake in the preheated oven until the cookies are slightly golden in color, 15 to 20 minutes or until cooked through and slightly golden.
- Step 16
Using a serrated knife, carefully slice off the end of the cookie that does not have the almond.
- Step 17
You don’t need to slice off much of the cookie, just enough to make a jagged edge.
- Step 18
Place jam into a small microwave-safe bowl.
- Step 19
Microwave for 5 second or until jam loosens up slightly.
- Step 20
Remove the almond from each cookie; place a few drops of the jam into the place where the almond was.
- Step 21
Replace the almond and press lightly causing the jam to ooze out around the tip of the finger.
- Step 22
Dip the other end of the finger in the jam to create a severed finger.
- Step 23
Let jam dry before serving.
Tips & Tricks

@it-is-a-keeper
Hi! I’m Christina… welcome to my kitchen! It’s so nice to meet you! I share tried and true recipes that anyone can make. I believe, if you can read, you can cook.
Per serving
Be the first to review this recipe and earn a 20% Bonus
Level up & unlock free Premium by reviewing recipes!
More Recipes From It is a Keeper
From the creator of this recipe


No Recipes Available
Recommended Recipes for you
Tailored to your preferences